Views: 0 Author: Site Editor Publish Time: 2025-07-28 Origin: Site
 You should follow important steps to do well with pressure forming. This process lets you shape plastic sheets very carefully. Pressure forming is special in thermoforming because it makes detailed parts easily. If you are patient and think about safety, pressure forming is simple and fun. You might make mistakes, but you learn from each try. When you know about pressure forming and thermoforming, you will not get upset. You will also get better results on your first try.
Pick plastic sheets such as PETG or ABS. These are easy to use and make strong parts with pressure forming. - Make sure your workspace is clean and safe. Always wear gloves and eye protection. - Get your mold and plastic sheet ready with care. This helps stop dust, cracks, and parts not lining up. - Watch the temperature and pressure closely. This helps you get sharp details and stops mistakes. - Practice a lot, look out for common problems, and trim your parts with care for the best results.
You need the right materials and tools before you start pressure forming. This process uses heat and air pressure to shape plastic sheets. It helps you make parts with sharp edges and fine textures. Pressure forming is different from other thermoforming because it makes detailed parts.
Pick your thermoplastic sheets with care. Some good choices for pressure forming are:
PETG: Easy to shape, strong, and good for details.
ABS: Tough, does not break easily, and works outside.
Polycarbonate: Very strong and can handle heat.
PVC: Hard and does not catch fire easily.
HDPE: Lasts long and can handle bad weather.
Tip: Beginners like PETG and ABS best. They are easy to use and strong, so you will have fewer problems.
You also need a pressure forming machine. This machine uses air to press the hot plastic onto a mold. Aluminum molds work best because they move heat well and give you sharp details. If you are new, you can try epoxy or wood molds. These are good for practice, but they do not look as nice as aluminum.
Here is a table to compare some thermoplastic sheets:
| Thermoplastic Sheet | Durability | Ease of Use | Notes |
|---|---|---|---|
| PETG | High | Easy | Good for deep shapes |
| ABS | High | Easy | Not for high heat |
| Polycarbonate | Very High | Moderate | Handles sun and heat |
| PVC | Good | Moderate | Does not burn easily |
| HDPE | Good | Moderate | Handles weather well |
It is important to set up your workspace for safety and to work better. Always follow safety rules when using thermoforming tools. Here are some steps to help you get ready:
Keep all manuals and safety papers for your pressure forming machine.
Make sure your workspace has fresh air.
Use pressure relief tools to stop accidents.
Put your tools in a spot away from busy paths.
Wear gloves and eye protection for safety.
Note: Do not go over the pressure or heat limits from the maker. Check your tools often for damage or wear.
A clean and neat workspace helps you pay attention and make fewer mistakes. When your area is set up well, pressure forming is safer and more fun. Being careful helps you get the best results from your thermoforming projects.
You start the pressure forming process by preparing your mold and plastic sheet. Clean the mold carefully so dust or dirt does not affect the final part. Use a soft cloth or brush for this step. Check the mold for cracks or damage. A smooth, undamaged mold gives you better results.
Next, select the right thermoplastic sheet. Make sure the sheet is the correct thickness for your project. Thicker sheets work well for strong parts, while thinner sheets are good for lighter items. Cut the sheet to fit your machine. Remove any protective film from the plastic before you begin.
Tip: Always preheat your plastic sheet if your machine recommends it. This helps the sheet form evenly and reduces the risk of warping.
Align the sheet on the machine bed. Use guides or clamps to keep it in place. Good alignment helps you avoid mistakes during the pressure forming process.
Operating a pressure forming machine safely and effectively takes practice. Follow these steps each time you use the machine:
Put on safety gear. Wear gloves, eye protection, and sturdy shoes.
Inspect the machine for loose parts or damage. Check oil levels and make sure everything is clean.
Review the machine manual. Know where the emergency stop button is.
Turn on the power. Listen for strange noises.
Let the machine warm up if needed.
Set the pressure, temperature, and speed based on your material and mold.
Place the plastic sheet on the bed. Align it using guides.
Secure the sheet with clamps or a vacuum system.
Choose the right mold for your part.
Start the forming cycle. The machine heats the sheet and then uses high air pressure to press it onto the mold.
Watch the process closely. Look for any problems, like uneven forming or strange sounds.
When the cycle ends, release the clamps and remove the formed part.
Turn off the machine and clean up your workspace.
Note: Practice on scrap material before working on your final project. This helps you learn the pressure forming process and avoid costly mistakes.
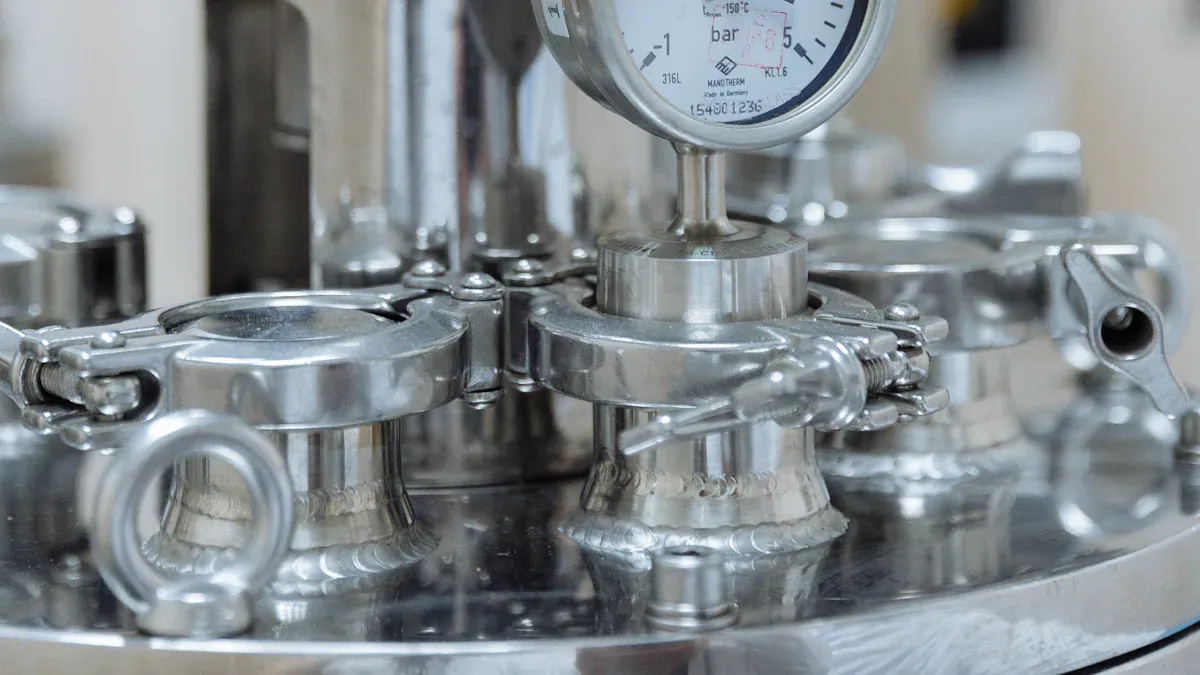
Precise control of temperature and pressure is key to the pressure forming process. If you keep the temperature steady, your plastic sheet will form smoothly. Too much heat can cause warping or bubbles. Too little heat can make the sheet crack or not form well.
Pressure forming uses much higher air pressure than vacuum forming. This extra pressure pushes the plastic deep into the mold, creating sharp corners and fine details. You can make parts with undercuts, hidden edges, and complex shapes. Vacuum forming cannot match this level of detail or finish.
| Feature | Pressure Forming | Vacuum Forming |
|---|---|---|
| Detail Level | Very High | Moderate |
| Sharp Corners | Yes | Limited |
| Undercuts | Possible | Difficult |
| Surface Finish | Smooth, Detailed | Less Detailed |
| Draft Angles | 1.5°–2° (female), 4°–6° (male) | Larger Needed |
Keep an eye on both temperature and pressure during the process. If you notice defects like sink marks, warping, or poor surface quality, adjust your settings. Try to keep the temperature difference at ejection below 20°F. This helps prevent warping and keeps your parts stable.
Tip: Good mold design also helps control heat and pressure. Use molds with water lines or high thermal conductivity for faster cooling and better results.
The pressure forming process gives you more freedom in design than other thermoforming methods. You can create strong, detailed, and attractive parts if you pay attention to each step. Always monitor your machine and materials to get the best results.
You may face some common problems when you try pressure forming for the first time. Air bubbles, warping, and poor detail often appear if you miss a step or rush the process. Air bubbles can form when dust or moisture gets trapped between the plastic sheet and the mold. Always clean both surfaces before you start. Warping usually happens if the sheet heats unevenly or cools too fast. Make sure you heat the plastic evenly and let it cool slowly. Poor detail can result from low air pressure or a dirty mold. Check your machine settings and keep your mold clean for sharp results.
If you see thin spots or holes in your pressure formed parts, you may have used too much pressure or heat. Lower the settings and try again with a new sheet.
Some shapes or deep features may not form perfectly on the first try. You might need to trim or sand these areas after forming. This extra step helps you get the best finish.
You want every part to look the same, especially if you make many pieces. To get consistent results with pressure forming, follow these proven tips:
Control the temperature closely when you heat the plastic sheet. Use a thermometer to check different spots.
Pick the right heating method for your plastic. Some sheets work better with infrared, others with convection or conduction.
Use the 10-10-5 rule. Measure the sheet temperature at several points and keep the difference small.
Match the mold temperature and air pressure during forming. This helps you get the same shape every time.
Use molds made from aluminum or special composites. These hold temperature well and last longer.
Handle your molds with care. Clean and store them properly to keep them in good shape.
These steps help you avoid defects like bubbles, warping, or thin spots. When you control each part of the process, your pressure forming projects will turn out better and more reliable.
After you remove your part from the mold, you need to trim away any extra plastic. This step helps your project look neat and professional. You can use different tools for this job. Many people use hand tools like utility knives or scissors for small cuts. For bigger jobs, you might use machines such as grinders, milling machines, or drills. These tools help you shape the edges and remove thick sections. Laser cutters can also give you very clean lines, especially on plastics and thin metals. If you work with metal parts, chemical etching can help you remove tiny bits and create fine details.
When you trim, pay attention to heat and vibration. Too much heat can melt the edges, and too much vibration can crack the part. Always work slowly and check your progress. After trimming, clean your pressure formed parts with a soft cloth and mild soap. This step removes dust and fingerprints. Make sure you dry the parts well to avoid water spots.
Tip: Always wear gloves and eye protection when trimming and cleaning. Safety comes first.
You want your finished part to look and work just right. Start by checking the edges. They should feel smooth and even. Look for any rough spots or leftover plastic. If you find any, trim or sand them again. Next, check the surface for bubbles, cracks, or warping. Hold the part up to the light to spot small flaws.
Measure the part to make sure it matches your design. Use a ruler or caliper for this step. If you see any mistakes, you can often fix them with a little extra trimming or sanding. For complex shapes, check that all the details formed correctly. Sometimes, you may need to do a second round of finishing to get the best result.
Note: Careful quality checks help you catch problems early. This saves time and materials on your next project.
You can get good at pressure forming if you follow easy steps. Try to practice often and learn from each time you work. When you practice on purpose, you get better and feel more sure of yourself. Always wear safety gear and check your tools before you start.
Mistakes help you learn new things. Be patient and keep trying. Start your first pressure forming project now and watch how much you improve!
Pressure forming uses high air pressure to push plastic onto a mold. Vacuum forming uses suction to pull the plastic. You get sharper details and deeper shapes with pressure forming.
You should pick a sheet based on your project needs. PETG and ABS work well for beginners. Look for thickness, strength, and how easy it is to form.
Yes, you can reuse molds if you keep them clean and undamaged. Aluminum molds last longer and give you better detail. Store your molds in a dry place.
You need gloves, eye protection, and sturdy shoes. Always keep your workspace clean. Read your machine’s manual for extra safety tips.
Air bubbles often come from dust or moisture on the mold or sheet. Clean both before you start. Use dry, high-quality plastic sheets for best results.


