
Views: 0 Author: Site Editor Publish Time: 2025-07-09 Origin: Site
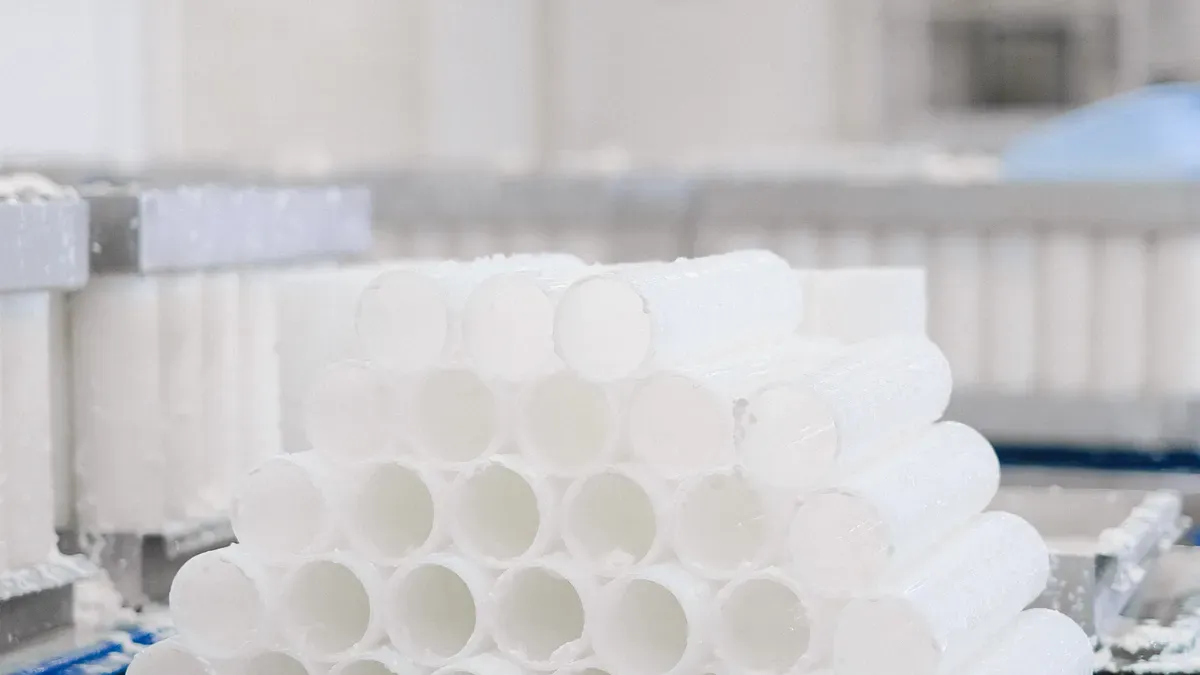
You can make plastic trays with vacuum forming. First, heat a plastic sheet. Next, shape it over a mold. Then, use a vacuum to pull the plastic tight. After that, let it cool and finish the tray. This way of making plastic is cheap for making many trays. It also lets you make special designs. Vacuum forming saves money, helps the environment, and works in many fields.
| Advantage | Description |
|---|---|
| Cost-Effective | Needs less money and cuts costs by up to 15%. |
| Versatile | Can use many kinds of plastics for many jobs. |
| Sustainable | Uses less power and makes less trash than other ways. |
Food, medical, and electronics companies use these trays. They help keep products safe, store them, and move them easily.
Vacuum forming is a cheap way to make plastic trays. It can save up to 15% on making costs. Picking the right mold material is very important. Cast aluminum works best for making many trays. Wood or 3D-printed plastic is good for small tests. Pick thermoplastics like ABS or PETG because they are strong. They are easy to shape and cool down fast. This helps make trays faster. Good mold design is also important. Draft angles and rounded corners help trays come out easily. This stops trays from getting damaged. You must heat and control the vacuum carefully. If you heat unevenly, trays can get weak spots or defects.
When you start making plastic trays with vacuum forming, you need to focus on the mold. The mold shapes the tray and decides how strong and smooth it will look. If you want your trays to last and look good, you must use a high-quality mold. Good molds help control the heat and stop the plastic from warping. This means your trays will have the right size and shape every time.
You can choose from several materials for your mold. The best choice depends on how many trays you want to make and how much money you want to spend. Here are some common options:
Wood
Cast aluminum
Structural foam
3D-printed plastic
Urethane resin
If you plan to make a lot of trays, you should pick cast aluminum. It works well for big jobs and gives you the best results. For small batches or testing, wood or 3D-printed plastic can save you money. The choice of mold material also affects how long your mold will last.
Tip: Aluminum molds cost more at first, but they last longer and give you better trays.
You can create many shapes and sizes with custom plastics. Custom molds let you design trays for special uses. You can add features like deep wells, raised edges, or logos. This makes custom plastic trays perfect for food, medical, or electronics packaging. You can even make trays that fit your product exactly. Custom plastics give you the freedom to try new ideas and solve problems.
Before you start forming, you must prepare your mold. Clean the surface and check for any rough spots. Smooth molds help the plastic form better and make the trays look nicer. You should also make sure the mold can handle the heat. If you use a metal mold, it will spread the heat evenly. This helps the plastic cool down the right way and keeps the tray strong.
Vacuum forming molds are easier and cheaper to make than molds for other methods like injection molding. You only need to copy the outside shape, not the inside. This saves you time and money, especially when you want to test new designs or make custom plastics.
Choosing the right plastic sheet is a key step in making strong and useful trays. You need to think about the type of plastic, the thickness, and how you prepare the sheets. Each choice affects the tray’s strength, look, and how well it works for your needs.
You have many options when picking plastics for vacuum forming. Thermoplastics work best because they are easy to shape, strong, and light. You can also cut or drill them after forming. Here are some popular choices:
ABS: Tough and impact-resistant.
Acrylic (PMMA): Clear and resists sunlight.
HDPE: Light and stands up to chemicals.
Kydex®: Flexible and strong, good for tricky shapes.
Polycarbonate: Very strong and see-through.
PETG: Clear and easy to form.
PVC: Cheap and useful for many jobs.
Styrene: Light and simple to work with.
Thermoplastics heat up and cool down fast. This helps you make trays quickly and keeps costs low.
Tip: You can use recycled plastics like polypropylene and polystyrene. They work almost as well as new plastics and help save resources.
The thickness and size of your plastic sheet matter a lot. Thicker sheets make stronger trays, especially if you need deep trays. If you use thin sheets for deep trays, the plastic might stretch too much and get weak. You should also use rounded corners and smooth shapes. This helps the plastic flow better and keeps the tray strong.
Use thicker sheets for deep trays.
Add rounded corners to reduce stress.
Make sure the mold has a slight angle so the tray comes off easily.
Before you start, check your plastic sheets for dust or scratches. Clean sheets give you better-looking trays. Cut the sheets to the right size for your mold. This helps you use less material and make less waste. You can also set up your process to collect and recycle the extra plastic trimmed from the edges. Many factories use smart designs and recycling systems to save material and lower costs.
Note: Using efficient designs and recycling systems helps you cut down on waste and protect the environment.
You can make plastic trays with vacuum forming by following steps. This way of making trays is best for making many trays, not just testing. Each step changes the tray and helps you get the same results every time.
First, you heat the plastic sheet. You need to make it soft and bendy. The heat you need depends on the plastic type. PVC and HDPE need 140–170°C. Acrylic needs 150–180°C. PETG works at 120–160°C. Polycarbonate needs 180–210°C. You must heat the sheet evenly. This stops weak spots and mistakes.
| Plastic Type | Forming Temperature (°C) |
|---|---|
| PVC | 140–170 |
| HDPE | 140–170 |
| Acrylic | 150–180 |
| PETG | 120–160 |
| PC | 180–210 |
Tip: Use a temperature gauge to check the heat. Even heating makes better trays and less waste.
When the plastic is soft, put it on the mold. The mold gives the tray its shape and size. Make sure the sheet is in the middle and covers the mold. Use thick sheets for deep trays. Rounded corners help the plastic move and stop cracks. You can make special shapes for food, medical, or electronics trays. This step is important because it sets the tray’s look.
Note: Thermoforming uses thicker sheets and takes more time. Vacuum forming is faster for small jobs.
Next, use vacuum to pull the plastic onto the mold. The vacuum takes out air and pushes the sheet into every part. You must watch the pressure. If it is too low, the tray will not look right. If it is too high, the plastic can break. The time you use the vacuum matters too. Fast vacuum stops bubbles and makes the tray better. Gauges and sensors help you keep the pressure just right.
| Factor | Description |
|---|---|
| Pressure Level | Right pressure gives good mold detail. Too little or too much causes defects. |
| Timing | Fast vacuum avoids bubbles and improves accuracy. |
| Gauges and Sensors | Use gauges for steady pressure and better precision. |
Callout: Good vacuum control makes better trays and stops mistakes.
After shaping, you must cool the tray before taking it off the mold. Cooling keeps the tray’s shape and stops it from bending. Each plastic needs a different way to cool. ABS must cool to 65–75°C before you take it off. Polycarbonate needs more time and must be cooler than 110–120°C. If you hurry, the tray can bend or lose its shape. Check the tray to make sure it is strong before you finish.
Cooling is hard during making. You must stop stress and keep the tray strong. Use fans or water sprays to cool faster if you need. Careful cooling helps you get good trays every time.
Tip: Cooling is the last step before you trim and finish. Go slow to keep the tray nice.
Here are the steps to make plastic trays with vacuum forming:
Heat the plastic sheet to the right temperature.
Put the sheet on the mold.
Use vacuum to shape the tray.
Cool the tray and take it off the mold.
Vacuum forming is fast and does not cost much for tools. Thermoforming and pressure forming take longer and cost more. You can use vacuum forming for small jobs and special trays.
| Process | Tooling Cost | Production Speed |
|---|---|---|
| Vacuum Forming | Low | Fast for small runs |
| Thermoforming | Medium | Slower with thick materials |
| Pressure Forming | High | Medium to slow |
Note: Vacuum forming is best for making lots of trays in factories. You can make many trays fast and save money.
When you take the tray off the mold, you need to cut off extra plastic. This step makes the tray look neat and gives it the right shape. You can use different ways to cut and trim, depending on how the tray looks and how smooth you want the edges.
| Step | Description |
|---|---|
| Part Fixturing | Hold the tray in place, often with a vacuum system. |
| Program Setup | Change your CAD design into a CNC program for cutting. |
| Precision Cutting | Use machines like CNC routers, die-cutters, or lasers to cut the tray. |
| Quality Inspection | Check each tray to see if the size and edges are correct. |
| Edge Finishing | Make the edges smooth and safe so they look nice. |
| Final Packaging | Pack trays carefully so they do not get damaged when shipped. |
Die-cutting is good for simple shapes. CNC routing is better for detailed cuts. Laser cutting and hot-knife trimming are good for special jobs. CNC routing is best if you need very exact cuts or only a few trays.
You need to check every tray for problems before you send them out. Careful checking helps you find mistakes early and keeps your trays safe.
| Quality Control Measure | Description |
|---|---|
| Material Selection | Choose strong, good plastic sheets for better trays. |
| Appearance Inspection | Look for bubbles, cracks, or bent spots on the tray. |
| Dimensional Measurement | Use tools to see if the tray is the right size. |
| Performance Testing | Test if trays are strong and can handle heat or cold. |
Some common problems are uneven heating, webbing, hard-to-remove trays, and changes in thickness. You can stop these problems by keeping your machines in good shape, using the right settings, and checking your molds often.
Tip: Always look for thin spots, rough edges, or bent trays. Fixing these problems early saves time and money.
Clean trays look better and work better. After you cut the trays, remove dust and small plastic pieces. Use air blowers, soft brushes, or water sprays to clean them. Sanding or buffing can make the tray smoother if there are marks from cutting. Some trays need extra steps, like adding textures or painting. These last steps make your trays look nice and ready to use.
Now you can pack your plastic trays for delivery. Careful finishing and checking help you send out safe, strong, and good-looking trays every time.
You must focus on mold design to make good trays. A well-designed mold stops problems and makes forming easier. Here are some simple tips:
Draft angles help trays come off the mold easily. Use angles between 3 and 5 degrees.
Try not to have undercuts. This makes removing trays simple and saves money.
Keep the width and height balanced. The height should be two or three times the width. This stops tearing and bending.
Put air holes in smart places. Air holes stop bubbles and keep the shape right.
Do not make the cavity too deep. The depth should be less than two-thirds of the width. This keeps trays thick and strong.
Avoid sharp corners. Rounded corners help plastic move and stop tearing.
Use the right corner radius. Rounded corners keep thickness even and make trays stronger.
Tip: Good mold design gives you trays that look nice and last longer.
You must control heating and vacuum to get good trays. Even heating makes trays strong and smooth. Uneven heating causes weak spots and bubbles. Check the temperature in different places on the sheet. This helps you stop thinning and bending.
Even heating gives you smooth walls and better surfaces.
Correct temperature stops bubbles and keeps trays strong.
Check both inside and outside temperatures. This helps trays look and work well.
Careful process control is needed for exact trays.
Mistakes in heat or timing can ruin trays. Follow steps closely.
Callout: Good heating and vacuum control means you get the same results and fewer mistakes.
You must pick the right plastic for your trays. The plastic affects price, strength, and how green it is. Look at how the plastic shapes, how tough it is, and if it meets safety rules. Here is a table to compare important things:
| Factor | Description |
|---|---|
| Formability and Melt Behavior | Some plastics shape better than others. Amorphous polymers often work best. |
| Mechanical Strength and Toughness | Strong plastics make trays that last longer and handle impacts. |
| Surface Finish and Clarity | Clear plastics are good for trays that need to look nice or show products. |
| Chemical and Temperature Resistance | Trays must handle food, chemicals, or heat without breaking. |
| Sustainability and Regulatory Compliance | Choose plastics that meet environmental and safety standards. |
Note: Using recycled plastics helps the planet and follows rules.
Sometimes you need stronger trays for special jobs. Twin sheet forming is a good way to make tough trays. This method uses two sheets at once. You get a tray with two walls that is stronger and insulates better. Here is a quick comparison:
| Feature | Twin Sheet Forming | Standard Vacuum Forming |
|---|---|---|
| Number of Sheets | Two sheets heated and formed together | One sheet formed against a mold |
| Wall Structure | Double-walled, seamless structure | Single-walled |
| Strength | Greater strength, joined at many points | Weaker, may need extra support |
| Applications | Good for trays needing durability and insulation | Best for simple shapes and lighter trays |
Tip: Twin sheet forming helps you make trays for hard jobs, like medical or factory uses.
You can make trays quickly if you follow these tips. Good mold design, careful heating, and smart material choice help you get trays that are always the same.
You can make plastic trays fast and without spending much money by using vacuum forming. This way gives you trays that are strong, light, and do not let water in. Look at how these trays are different from other types:
| Feature | Plastic Trays | Cardboard Packaging | Molded Pulp |
|---|---|---|---|
| Weight | Lightweight | Heavier | Moderate |
| Durability | High | Medium | Low |
| Moisture Resistance | Excellent | Poor | Moderate |
| Customization | High | Limited | Moderate |
Try these tips to get the best trays:
Put air holes in smart spots to stop bubbles.
Use rounded corners and draft angles so trays come off easily.
Make sure the cavity is not deeper than two-thirds of the width.
Pick custom designs that work for you and help the planet.
Vacuum forming uses heat and suction to shape plastic sheets over molds. You can make strong trays quickly. This process works well for custom designs and large batches.
You can use ABS, PETG, PVC, and polycarbonate. These plastics heat up easily and cool fast. They make trays that last and resist moisture.
You can sort, store, and protect items with plastic trays for product organization. These trays help you keep tools, parts, or supplies neat and easy to find.
You can recycle most trays if you use thermoplastics. Check local recycling rules. Using recycled materials helps you reduce waste and protect the environment.
You spend less on molds and tools. You can make many trays fast. This method saves money and works well for custom shapes.


